The Children's Art Book
Acrylic Painting Techniques
Dry Brush
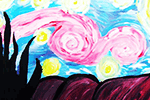
Squeeze paint onto a palette, and load it up immediate onto a dry brush without diluting. Drag your brush across the painting surface with light pressure. The dry brush technique imprints textured uneven brush lines that flows according to movements. Dry brushing works best when used over a painted texture surface.
Children paint realistic light fluffy clouds with a soft large rounded brush. The same brush can also create impression of sand when used on paintings of playgrounds or the beach!
A sharp edged hard brush can be used to create tree bark textures and perfect for printing lines of the coconut palm leaves.
Difficulty: Age 3 years old and up.
Washing
If you thin the acrylic enough with a lot of water, it begins to behave like watercolour, except that watercolours may be lifted off the canvas. Acrylic washes thinned with water appear translucent, are often used as paint foundations, such as flesh tones when painting humans. Build up colour and tone with additional washes.
Choose paper that are fairly heavy to accept the washes of acrylic paint without tearing or buckling. Use at least 125gsm art paper. Careful though, children especially enjoy tearing paper when its wet!
If your art room at home is running out of poster paints, you may try acrylic washing instead.
Difficulty: Age 5 years old and up. Might get messy, adults may help to dilute acrylic before use.
Stippling
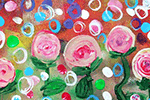
Put it simply, stippling involves creating an assembly of random tiny dotted colours and scattered brush marks using the bristle ends of the brush. This assembly of many small spots of colours shows textures through build up of acrylic paint on top of another, creating subtle variations of colour and illusions of grain.
Stippling is perfect for painting tiny petals of a flower field, or feathers of the chicken! Older children may know recognise stippling as very similar to pointillism, a technique associated with famous French painter Georges Seurat.(refer to Circus Sideshow (Parade de Cirque) (1889)
Encourage children to stipple with common textured objects found at home, such as sponges, cotton buds and bubble wraps. Dab the object lightly with acrylic paint, and press on the canvas and lift quickly. Repeat the dabs and lifts until you achieve the density of small spots with the intended texture!
Difficulty: 7 years old and up.
Splattering
Children love paint splattering! Obviously, since they may already possessed the techniques since infancy! It’s energetic, very fun, yet can be messy if not done carefully! For a start, wear your painting clothes and cover floor, walls and objects that you want to keep pristine!
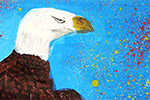
Dispense some paint into small containers and dilute. Some water will make splattering easier. Children will find innovative ways to splatter paint everywhere! Generally, we recommended these two ways to better control splattering:
1. Tap-to-flick: Dip the paintbrush with acrylic paint, and tap this paintbrush with your other hand or another paintbrush. The tap will force some paint out of the bristles in the direction of the flick.
2. Finger-run: Load a toothbrush or paintbrush with bristles pointed down towards the canvas. Run your fingers through the bristles, pulling it back and allow it to spring launch paint onto the canvas. Put on children sized gloves to prevent fingers from getting dirty, and dirty finger tips on sofas.
Try experimenting with different sized brushes and paints. Use multiple colours to create visual energy and excitement!
Difficulty: 4 years old and up, though infants may be able to do it too!
Dabbing
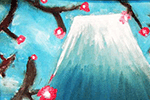
Dabbing is a perfect technique for adding textures and movements to your artwork. Using a sponge or hard bristle brush, press on undiluted acrylic paint and pounce them onto your canvas. Apply multiple layers to build depth, working from dark to light.
Dabbing works well when creating bushes, treetop foliage, ground textures or rocks!
Difficulty: 5 years old and up.
Palette Knife
Children love the excitement of using different materials, tools and paints, and palette knives are a fun and refreshing way to instantly spice up a painting! It is a perfect all-in-one tool: Mix and apply paint with only one tool!
Scrape some acrylic paint as you would to butter, and spread it like frosting on a cake. Apart from spreading paint using the side of the blade, children can also use the tip to create small dots, or fine lines by pressing on the blade’s edge. Large flat areas, such as water or sky, are particularly fun to paint with a large blade palette knife.
If you haven’t got a palette knife, you can also apply similar techniques with objects at home! Use expired cards into odd-sized strips, or use plastic rulers or old baking spatulas for larger areas!


