
The Children's Art Book


Coloured Pencil Techniques
Most coloured pencil artworks employ various techniques. Here are some techniques for children to explore and master, to be used independently or together as combinations to create beautiful coloured pencil renditions!
Choosing Coloured Pencils
There are many varieties coloured pencils available in the market, ranging from coloured pencil starter kits, school goers’ sets and artist grade pencils.
Artist grade pencils typically produce brilliant colours largely due to high pigment concentration. They apply better onto mediums and make colouring more accurate and effective. Student grade coloured pencils or starter kits generally have less pigments and blend paler than artist grade ones. They tend to streak more (no colours deposited on the mediums), or require more pressure or repeated colouring.
Choose your coloured pencils according to the use.
For toddlers, opt for student grade coloured pencils to allow children to exercise their fine motor skills without vandalising tables, floors and books!
As children gain better fine motor skills, consider offering coloured pencils with high pigment strength so that they can recreate their favourite characters and objects with greater ease and better colours.
Stippling
Stippling involves dotting on an area many times. Dots may be far from each other or close together. Concentrate dots close to create a dense coloured impression, or spread them away for light hints of colours in the area. Use blunt coloured pencils as they produce better dots and pencil points are less likely to snap and crack when young children cheekily jab them onto the paper!
Back and Forth
The back and forth technique is one of the most basic techniques that you probably did not know there was a name for it! Place the coloured pencil on the paper, and move the pencil continuously in a back and forth motion without lifting off the paper. Most adults would not even consider this a technique, but back and forth strokes are ideal when used to fill areas quickly.
Hatching
Hatching is a common technique for drawing and colouring with pencils or pastels. To hatch, draw parallel lines (of the same direction), without any of the lines touching each other. Choose a direction, be it vertical, horizontal or any angle, just to make sure your direction is consistent. The lines can be close together or far apart, depending on how much colour you want to have in that area. Unlike the back and forth stroke, lift the pencil off the paper to make each new line.
Cross-hatching
As the name suggests, cross-hatching involves drawing a second hatch, essentially a new series of parallel lines on top of the first hatch. The second hatch usually goes perpendicular to the first, but feel free to explore your angles. This method creates intersecting (“cross”) lines, and create beautiful shading and textures. Best cross-hatching effects are achieved with pointy coloured pencils that form clean and detailed lines.
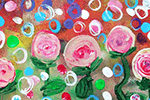
Scumbling
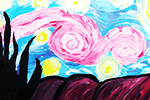
Scumbling (or circulation) is yet another stroke you didn’t know was an actual technique! Scumbling is achieved by drawing connected spirals, making continuous circular marks, layering colours on top of another. Without lifting the coloured pencil, this is a quick and effective way to fill areas with with rounded boundaries with smooth colours (e.g. scumbling close to the edge of the sun.)
Young children may find shading in small circular movements tiring on the wrists. Do it as an activity with the children!
Burnishing
Burnishing is simply polishing by rubbing. To achieve the distinctive sheen of coloured pencil burnishes, build up light layers of colour with back and forth strokes continuously on top of one another, until the surface is fully covered, waxy and smooth.
Scraping is a technique that can be applied after burnishing. Use a sharp tip, such as a knife tool, to scratch or scrape off areas of pigment build up from burnishing. Scraping is especially effective on fine, detailed, textured areas, such as individual hairs or fur.
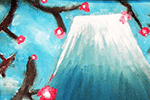
Directional marking
Directional marks are created by drawing coloured pencil lines that follow the direction or contours of the object, such as the flow of hair, or the curvature of the grass blade. Depending on the texture you wish to achieve, directional marks may be short or long flowing. If placed close together and in layers, and coupled with colour shadings and blends, directional marks can created a dense texture that suggests the direction of the object.
Rubbing
One of the easiest way to achieve texture with coloured pencils is through rubbing. Place a sheet of drawing paper over a tactile textured surface, such as seashells, coins, leaves, or any objects with bumps and ridges. Colour the paper by “rubbing” the coloured pencil on the paper, using back and forth strokes, or scumbling, and the textured surface will be “transferred” onto the paper! To get as many of the texture details, opt for thinner paper as they wrap closer around the surfaces than thicker paper.
Oil
The coloured pigments of coloured pencils are deposited on the surface of the paper. Add a small amount of baby oil onto a cotton swab or ball, and rub on the coloured pencil areas in the direction of the blend. For tiny areas and intricate spaces, try using a cotton stick (or Q-tip). The oil acts as a fluid agent to carry and smear the coloured pigments around.


 Programmes